September 1, 2023
How to Record a Video on Mac

Mike
Welcome to our guide on "How to Record a Video on Mac".
If you've ever wondered how to capture a screen recording or take a quick video on your Mac, you've come to the right place. If you’ve tried using programs like OBS, then you know it’s not always that easy.
This guide will teach you how to do it all in no time.
It doesn't matter if you're an educator trying to record a tutorial or a creator looking to make content for your channels. Even if you're simply someone who wants to record occasional videos. This guide has got you covered.
Read on as we break down each of these methods, step by step, to help you record videos effortlessly on your Mac.
Looking for recording on another device, like a Chromebook? Don't worry, you have options.
Table of Contents
How to get your Mac ready for video recording
Method #1 - Recording Videos Using QuickTime Player
Method #2 - Recording Your Screen with Tella
Method #3 - Recording with Photo Booth
Tips for Recording Video on a Mac
Troubleshooting When Recording Videos on Mac
Wrapping Up
How to get your Mac ready for video recording

Getting your Mac prepared before recording a video is crucial. This is to ensure good quality and an uninterrupted process. It’ll also save you a lot of time in the long run since it minimizes the risk of having to rerecord your content.
In this section, we'll run through the steps to make sure your Mac is set up for recording your videos.
Checking the Equipment
Make sure your Mac's built-in camera and microphone are working properly. This means testing them out before starting the recording process. You can do this by using a free online tool, like WebcamMicTest.
Also, make sure your audio levels are appropriate to ensure your audience can hear you clearly.
Cleaning Your Mac's Screen
Before you start a screen recording, it might be a good idea to clean up your screen.
No, we don’t mean wiping the actual screen, although that can be nice for you. We mean closing unnecessary tabs, removing icons off the desktop, and making sure only the relevant things are visible.
This helps create a neat and focused video for your viewers.
Ensuring Adequate Storage Space
Videos can take up a lot of space on your Mac.
Therefore, make sure you have enough space for the video file before you start recording.
If space is limited, try to free up some by deleting unnecessary files or moving some data to an external drive. It’s always best to record directly to the hard drive, rather than an external one.
Setting Up the Environment
Last but not least, consider your recording environment.
If you’re recording a video with a camera, make sure the room has good lighting. If you're recording your voice, ensure there isn't background noise.
It's these little preparations may only take a few extra minutes. However, they can have a significant impact on the quality and professionalism of your videos.
Now that your Mac is ready for the job, let's go ahead and start recording!
Method #1 - Recording videos using QuickTime Player
QuickTime Player - a handy application that comes pre-installed on your Mac - is more versatile than you might think.
It allows for both screen and webcam recording. Let's break down the process into simple steps for you.
Screen Recording with QuickTime Player
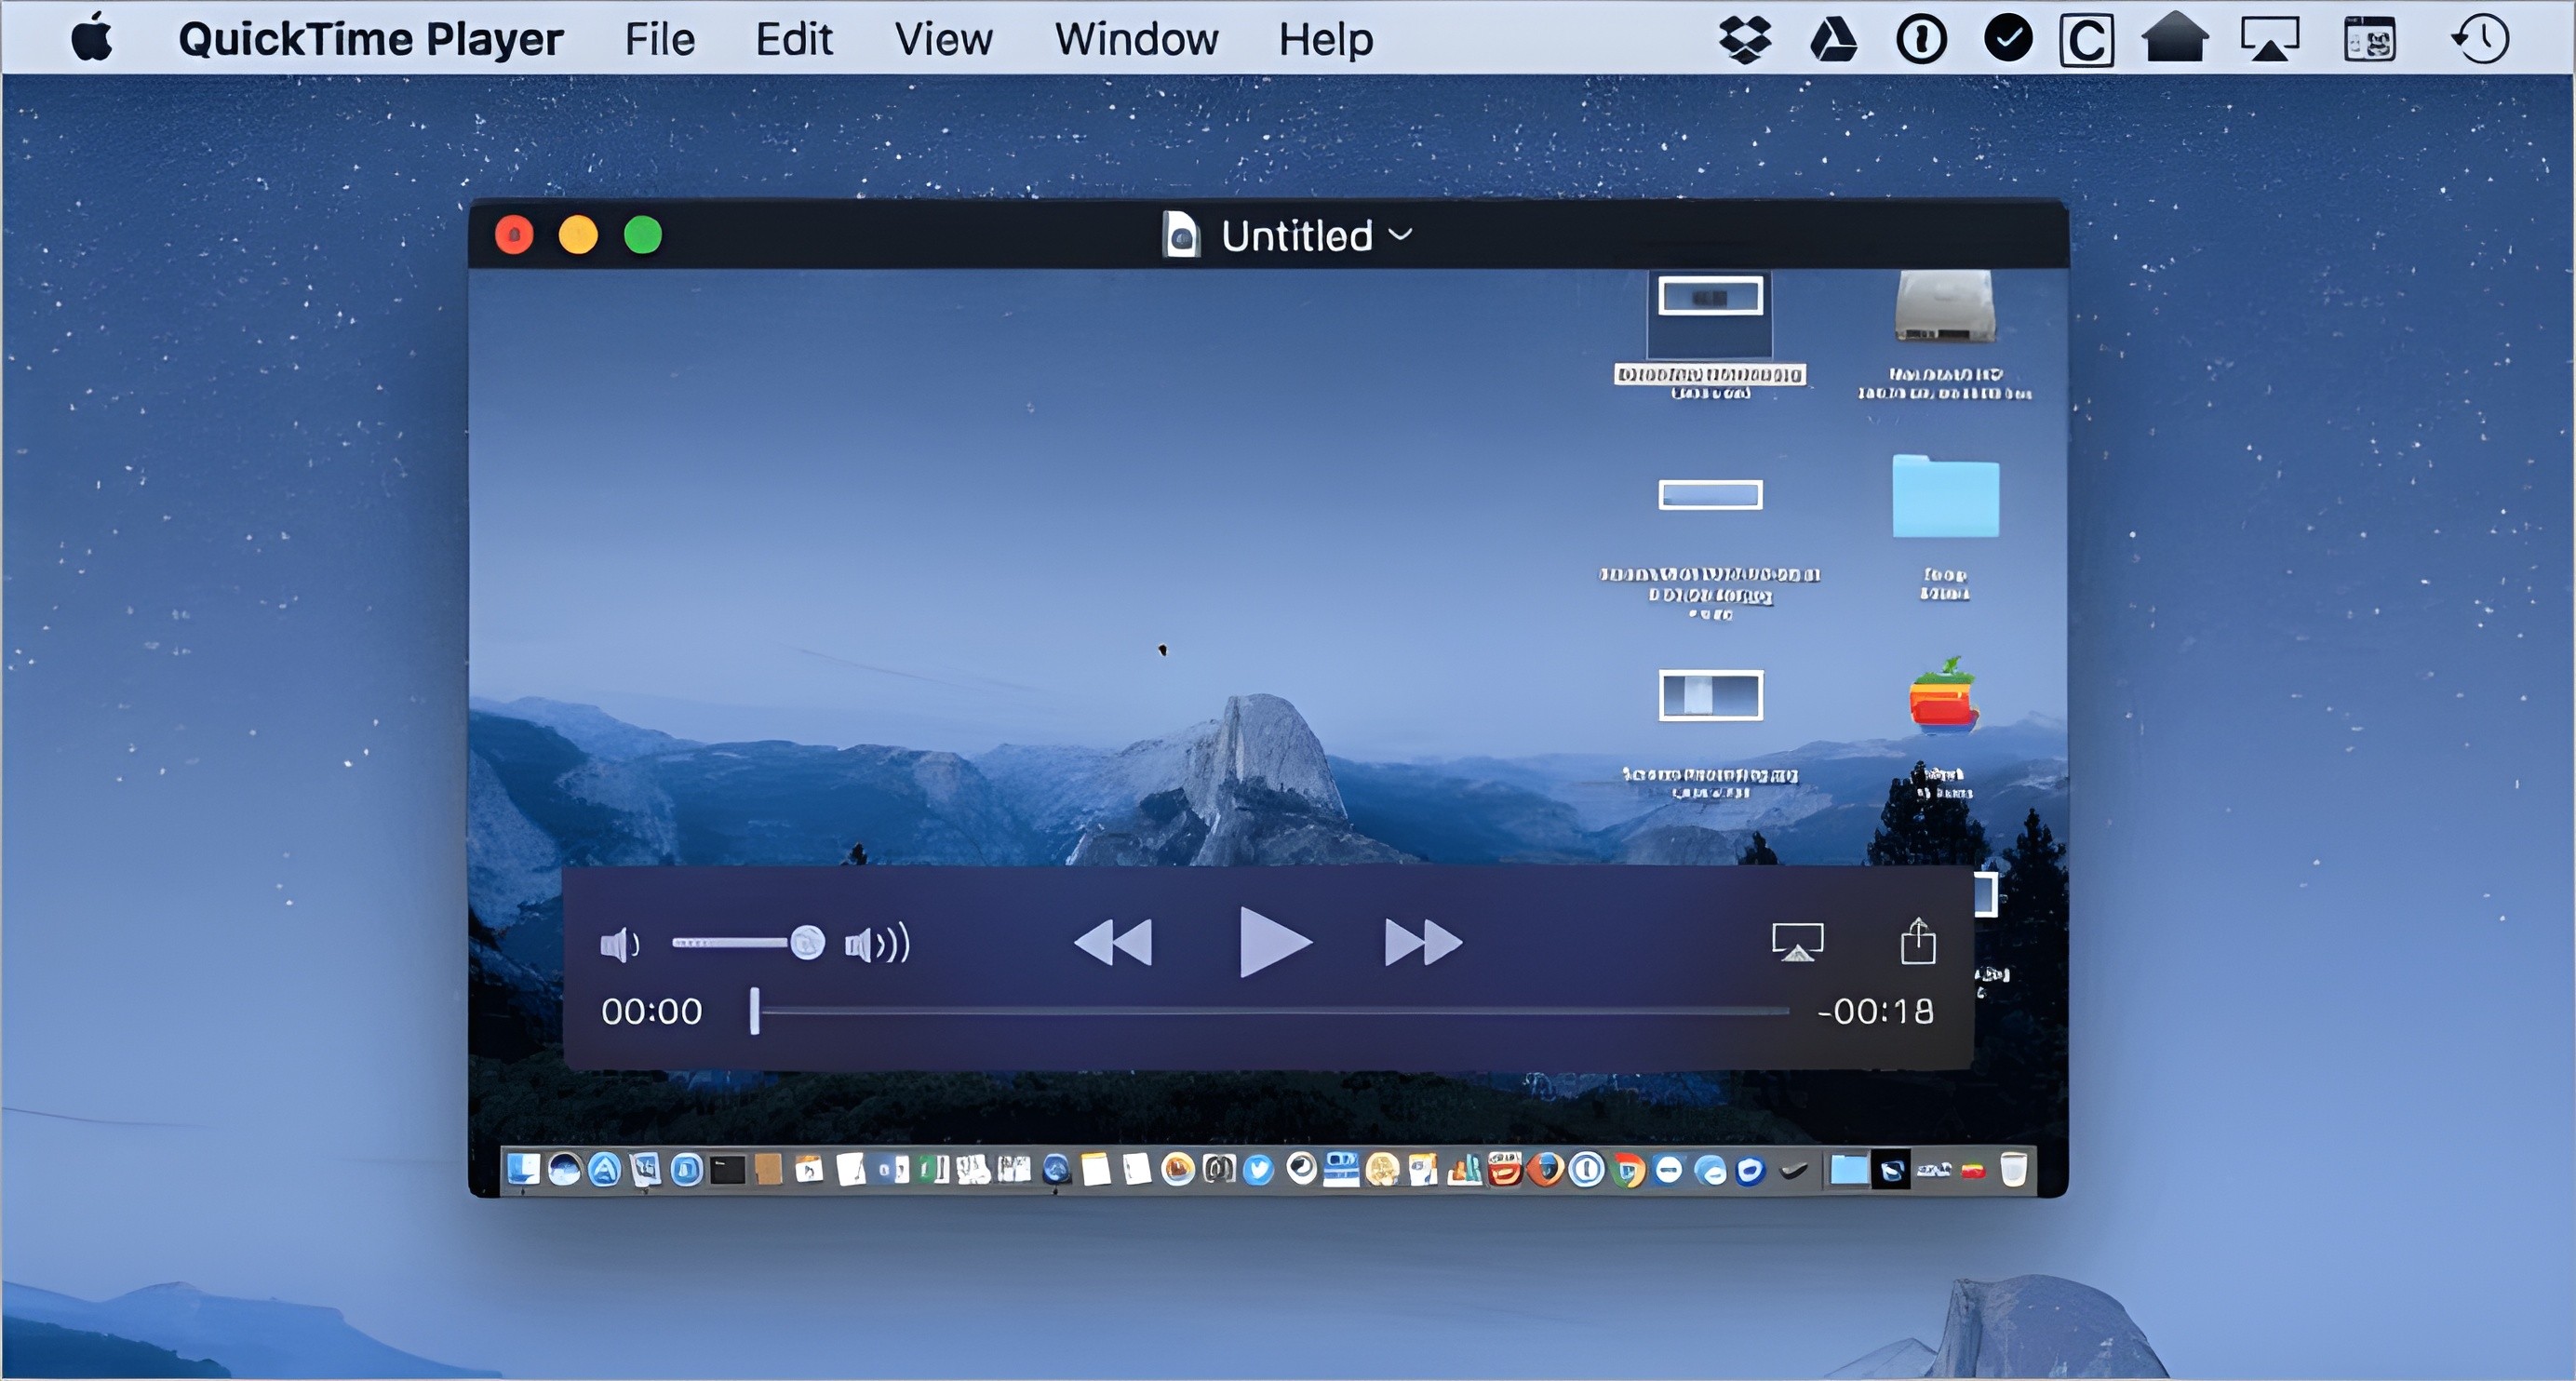
Start by opening the QuickTime Player. You can find it in your Applications folder, or you can use the Spotlight search (Command + Space) to find it.
In your top menu bar, select "File", then "New Screen Recording". A recording window will appear.

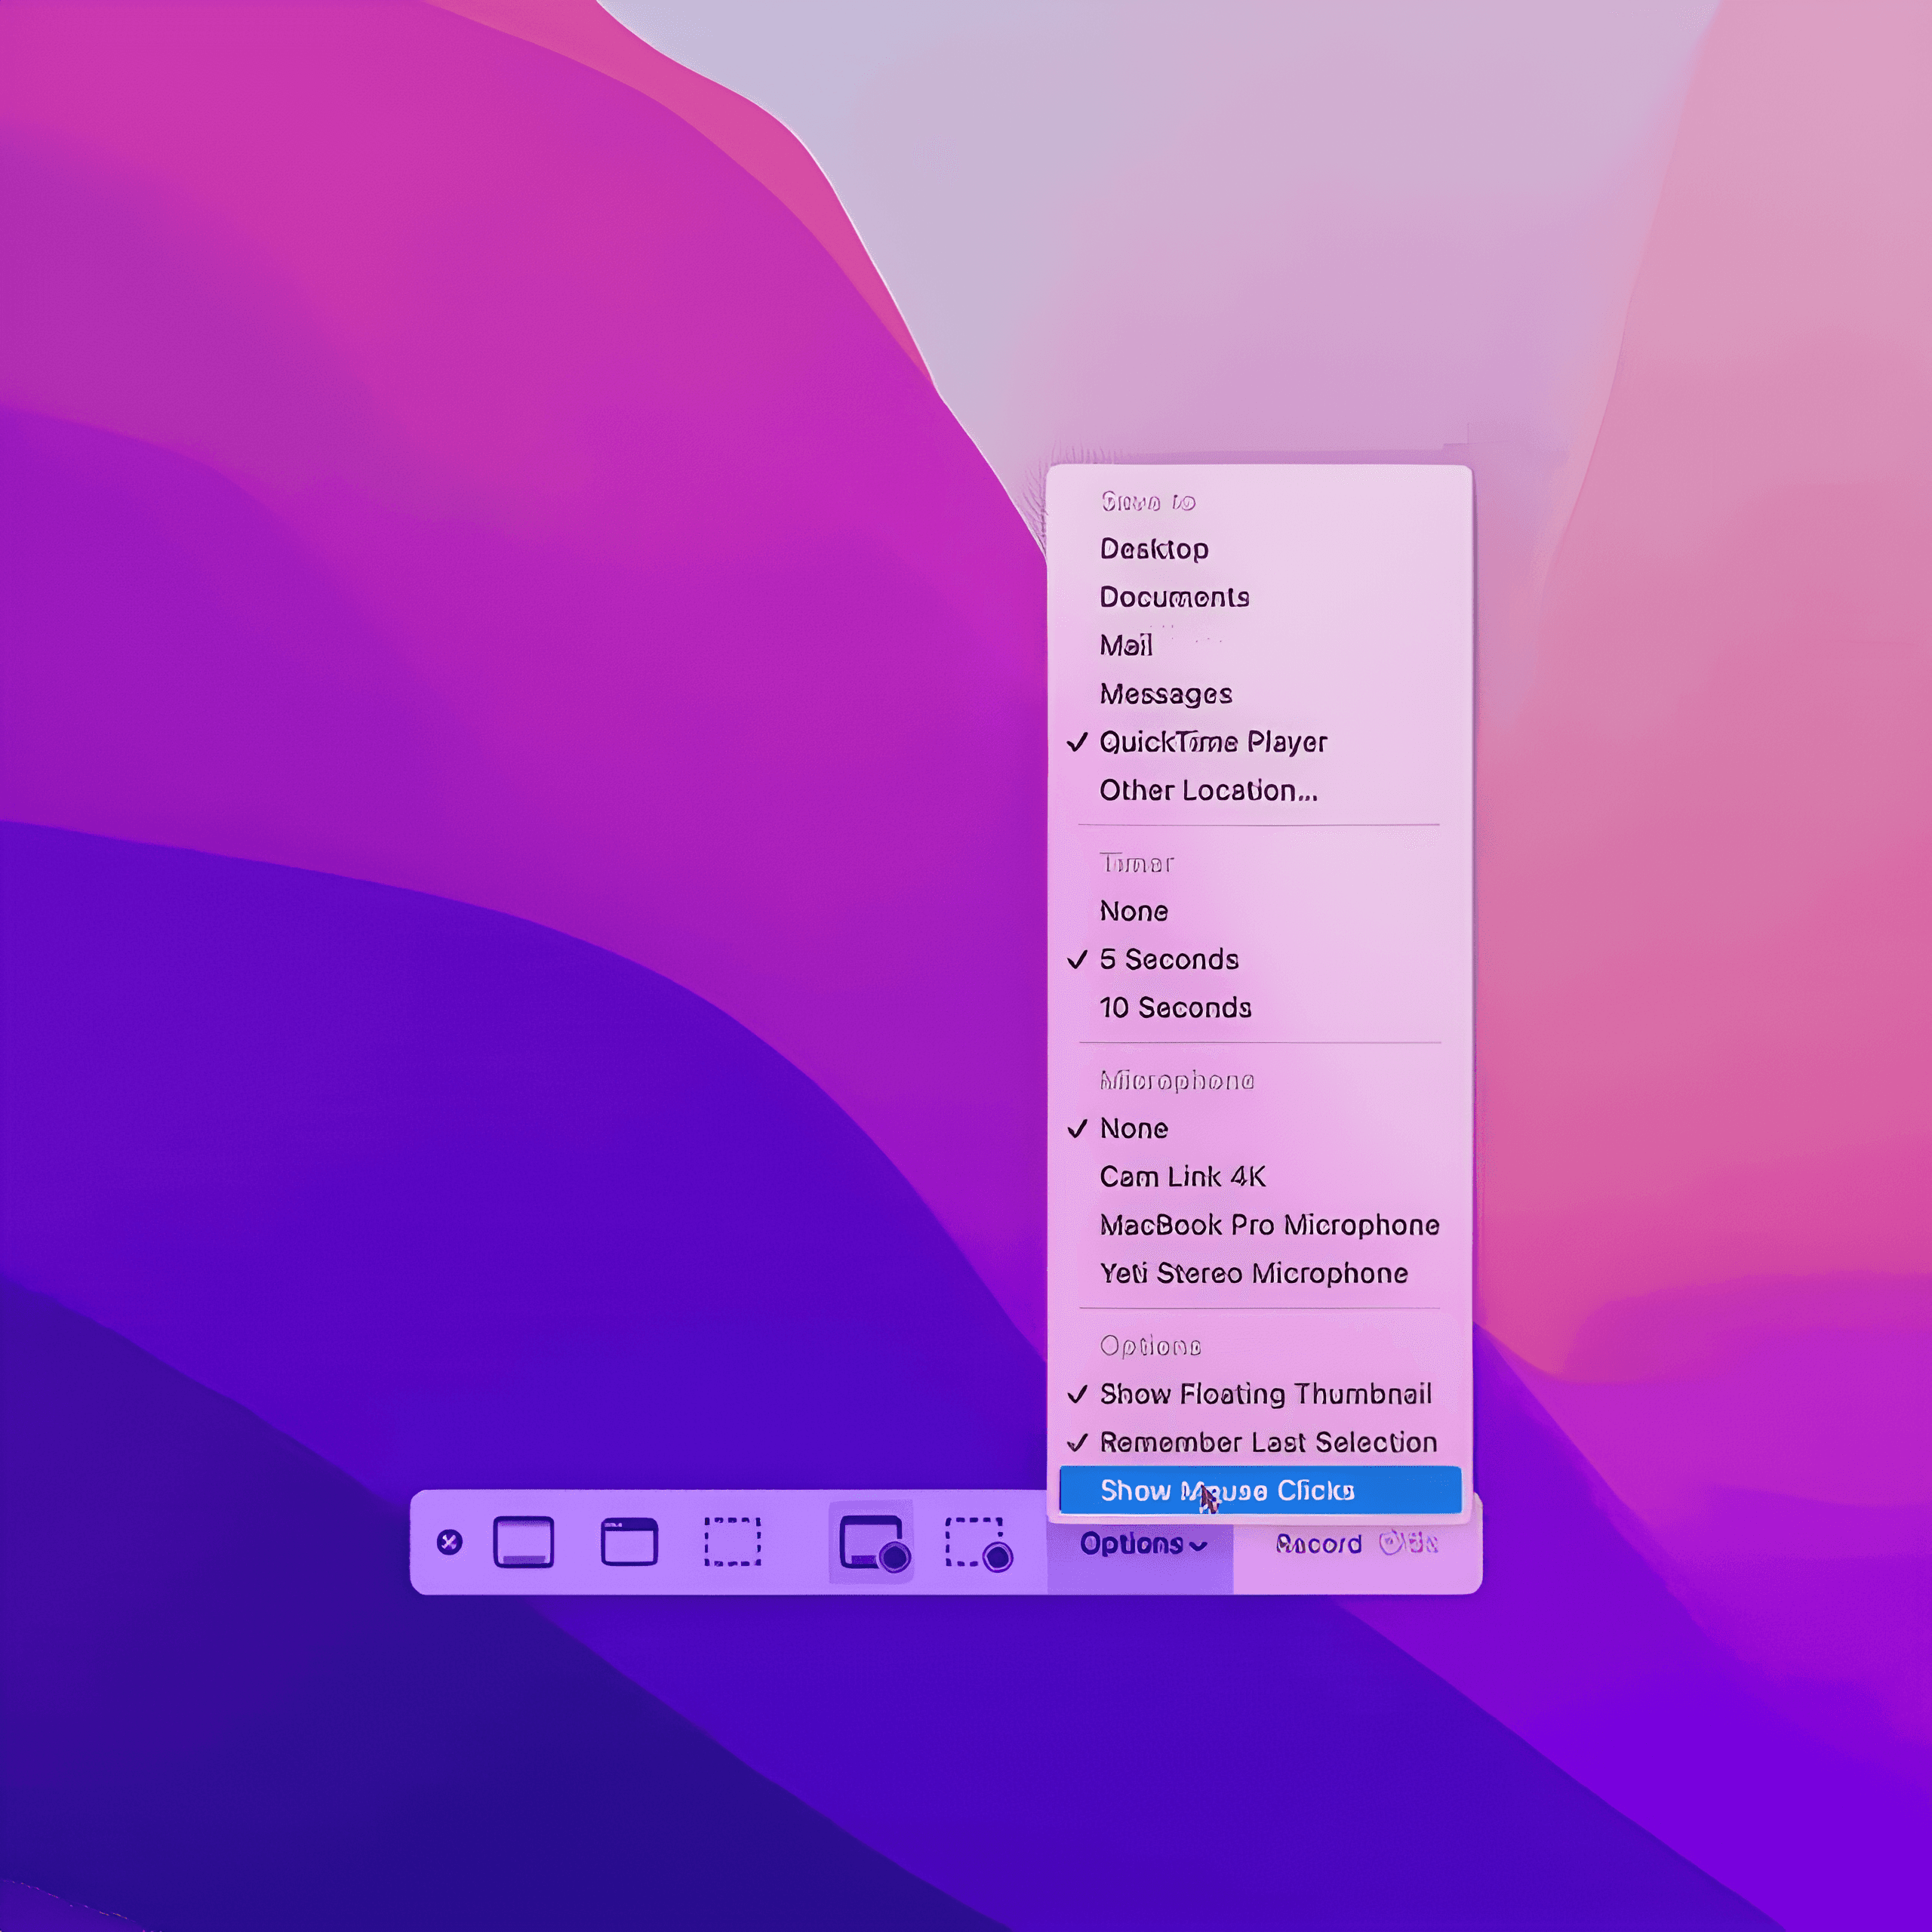
Click on the arrow next to the red record button for more options. Here you can choose your microphone (if needed), decide whether or not to show mouse clicks, and more.
Click the red record button. You'll be given the option to record the entire screen or just a part of it. If you want to record the full screen, click anywhere on your screen. To record a portion, drag to select that particular area.
Once your recording area is set, click "Start Recording".
When you want to stop recording, click the Stop button in the menu bar. Your recording will open automatically in QuickTime.
Webcam Recording with QuickTime Player
Open QuickTime Player.
Click on "File" in the top menu bar, then select "New Movie Recording".
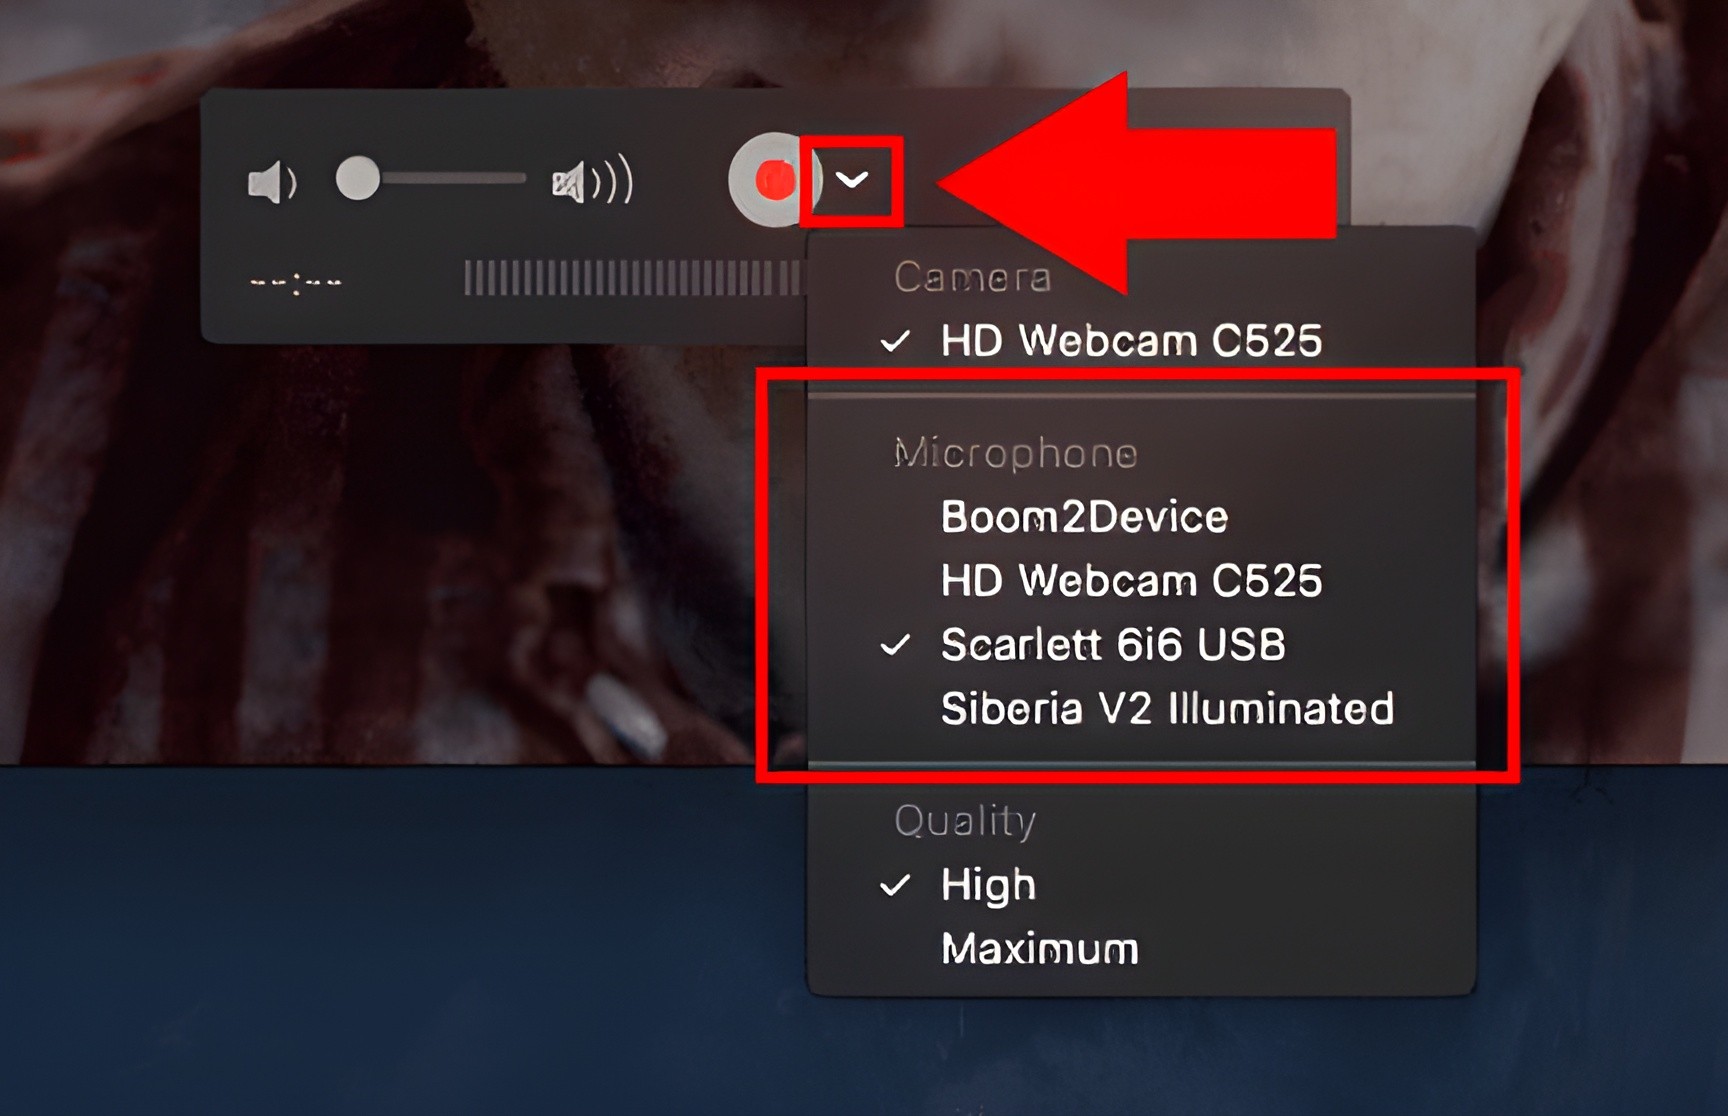
In the recording window that appears, click the down arrow next to the record button and change it to your camera. Check your video preview. If everything seems alright, click the red record button to start recording.
When you're done, again click the stop button in the menu bar.
Both the screen and webcam recordings will be automatically saved on your Mac. Just find them in your recording’s folder, and you can do whatever you need to do with them.
Remember, QuickTime Player is simple to use and requires no extra downloads, making it a perfect fit if you prefer minimal tools.
By the way, did you know that Apple has features which lets you eliminate background noise and blur your camera's background.
Also, if you get technical glitches during recording, such as freezing or issues with interface responsiveness, performing a reset SMC on your Mac might resolve it.
Method #2 - Screen Recording with Tella

Tella.tv is a platform created specifically for recording and editing how-to videos, demos, presentations, and more. It offers a simple and user-friendly method to capture your screen or webcam.
Here's how to use Tella.tv for screen recording on your Mac.
Start by visiting Tella's website.
Click on "Get Started" to sign up. You can use your existing Google account to sign in.
Once logged in, you can create a new project directly on your browser. You can also download Tella directly to your Mac as a Mac App. Simply download the file and follow the onscreen installation instructions.
Open it when you’re ready, or start from the browser or the Tella Chrome extension.
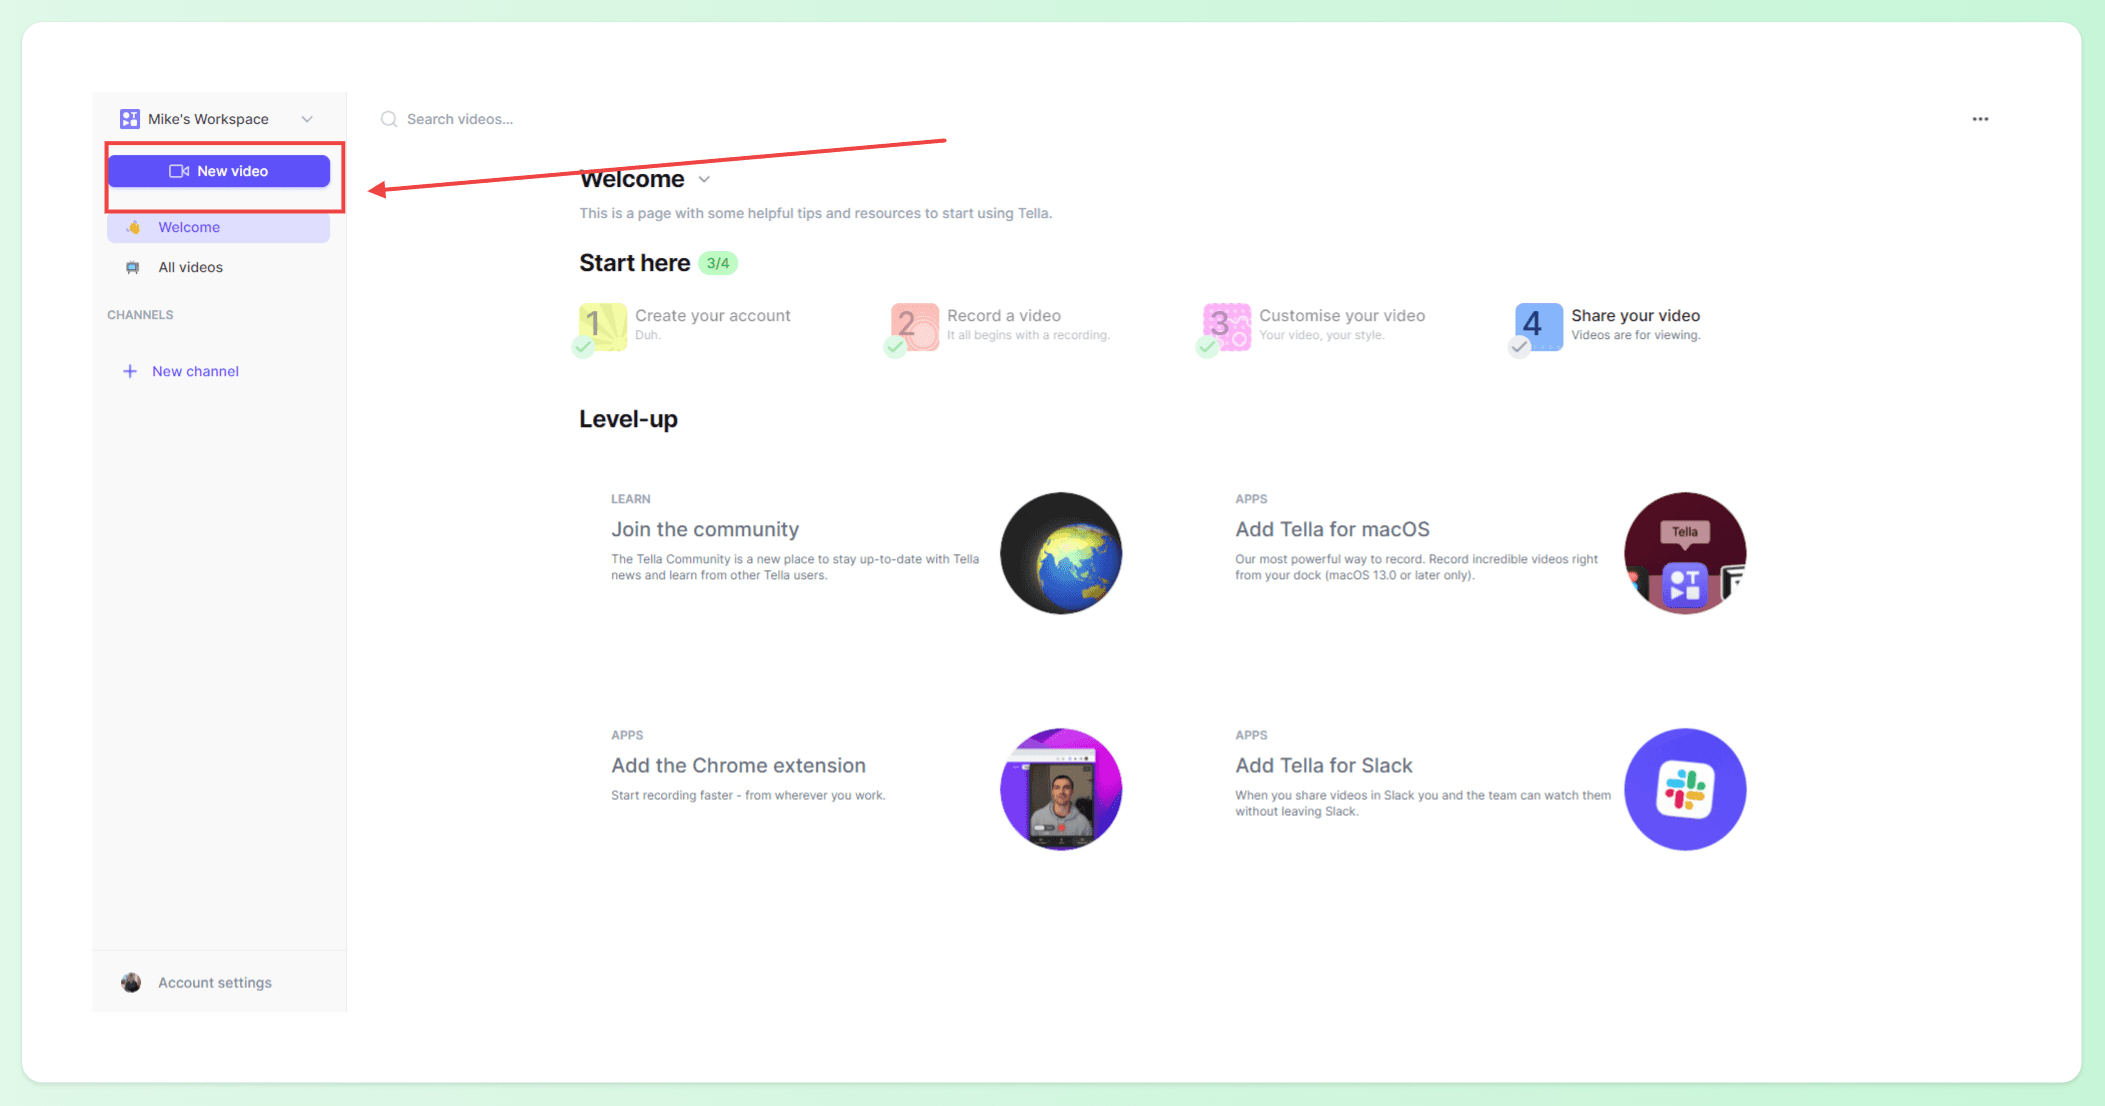
Click on the "New Video" option. Tella will guide you through the setup process where it asks for permissions to use your camera, microphone, and screen.
Choose what you want to capture. Tella allows you to record your whole screen, a browser tab, or a webcam feed.
Once set up, you can start recording. Unlike other tools, Tella offers a "clip-by-clip" recording method. This means you can record your video in shorter clips, perfecting each section, and avoiding the need for heavy editing later.
After you’ve finished a clip, you can preview it instantly. If you’re not happy with it, you can record it again.
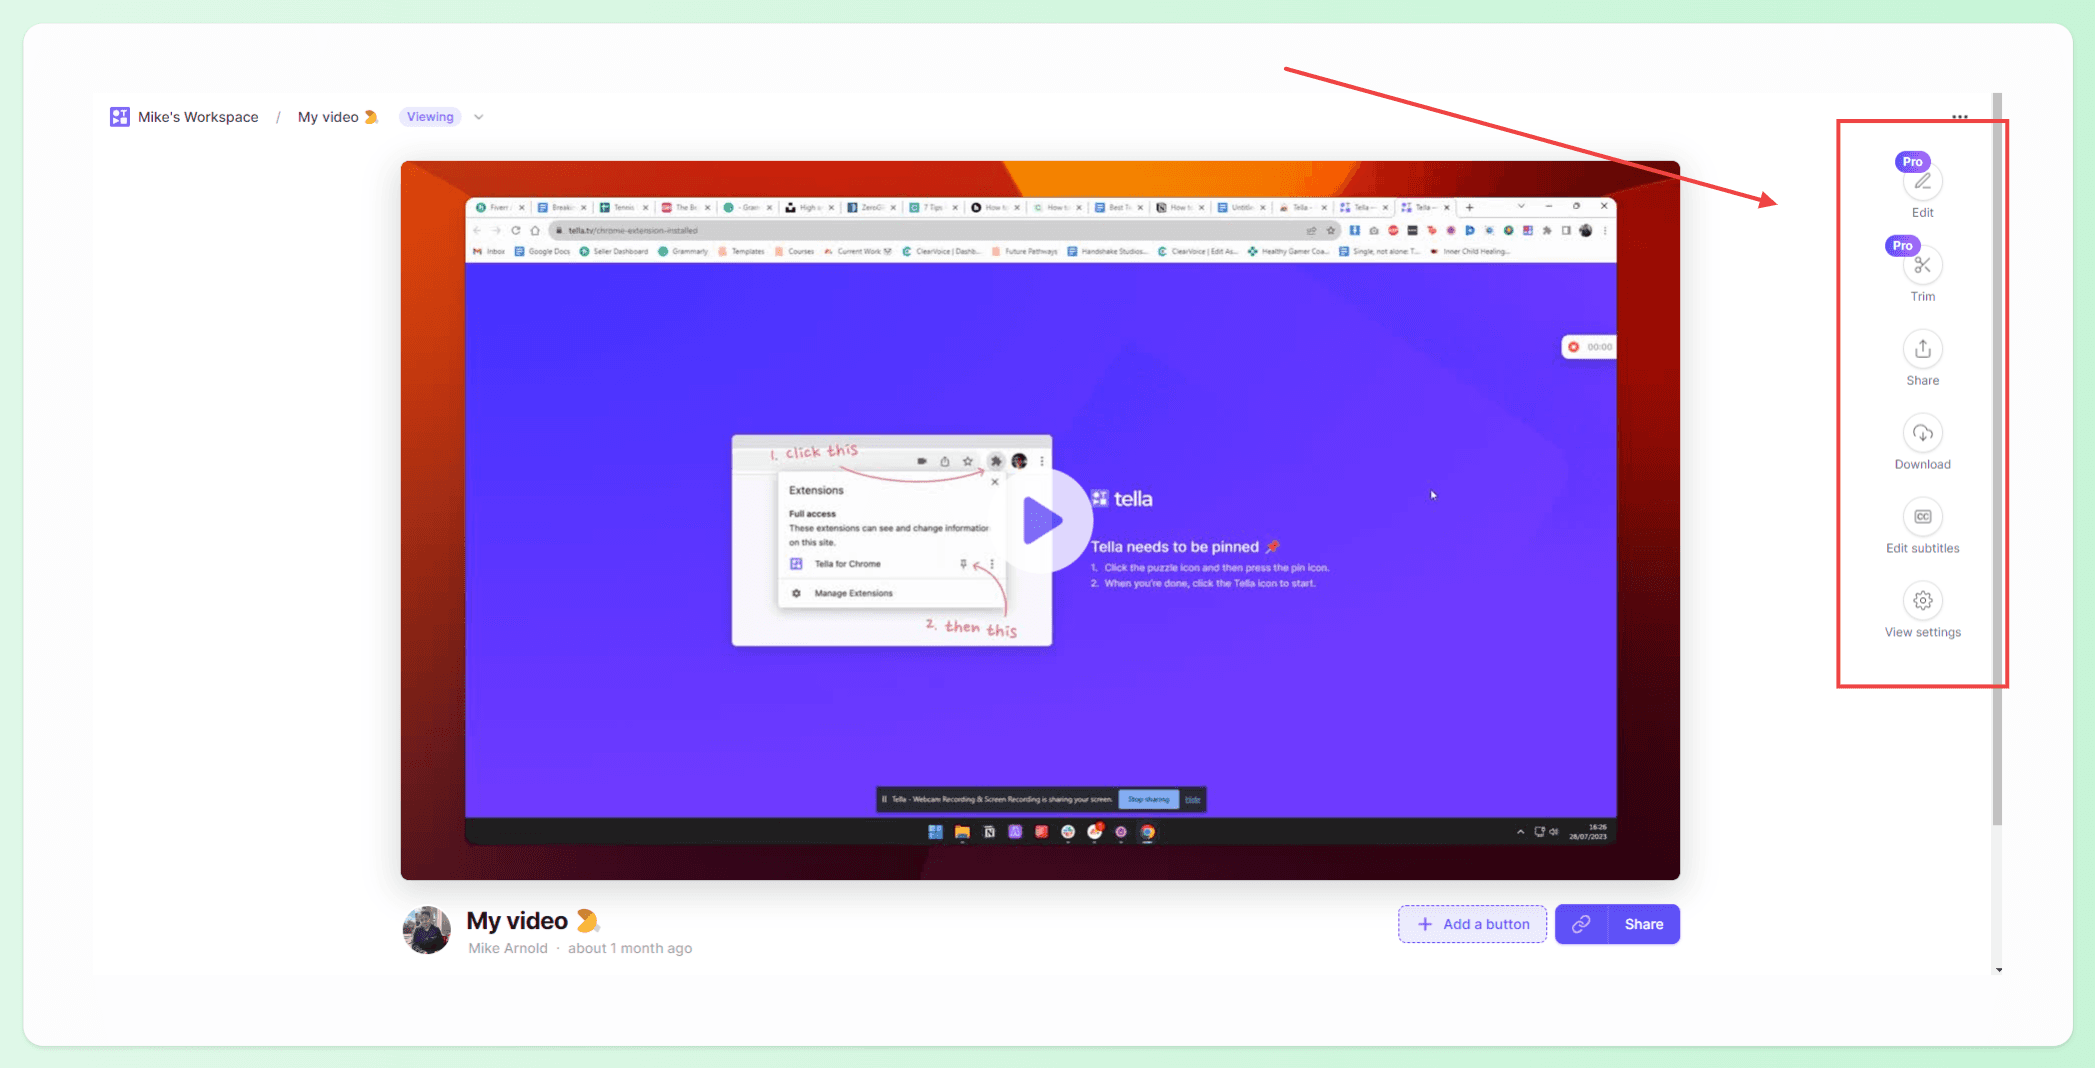
Tella also allows you to trim and arrange your recorded clips, add text overlays, and even merge multiple clips into one.
Subtitles are automatically generated but you can also decide to hide them by default
Tella offers a fresh approach to video recording, giving you more flexibility and control over your content. It's a good match if you want to create more polished, professional videos without the hassle of complicated editing software.
Method #3 - Casual video recording with Photo Booth
If you're looking for a quick and easy way to create a video using your webcam, Photo Booth is the answer.
This app, pre-existing on your Mac, is originally designed for taking photos. However, it also has simple video recording capabilities. It's great for recording playful videos, video messages, or brief updates without any fuss.
Here's how:
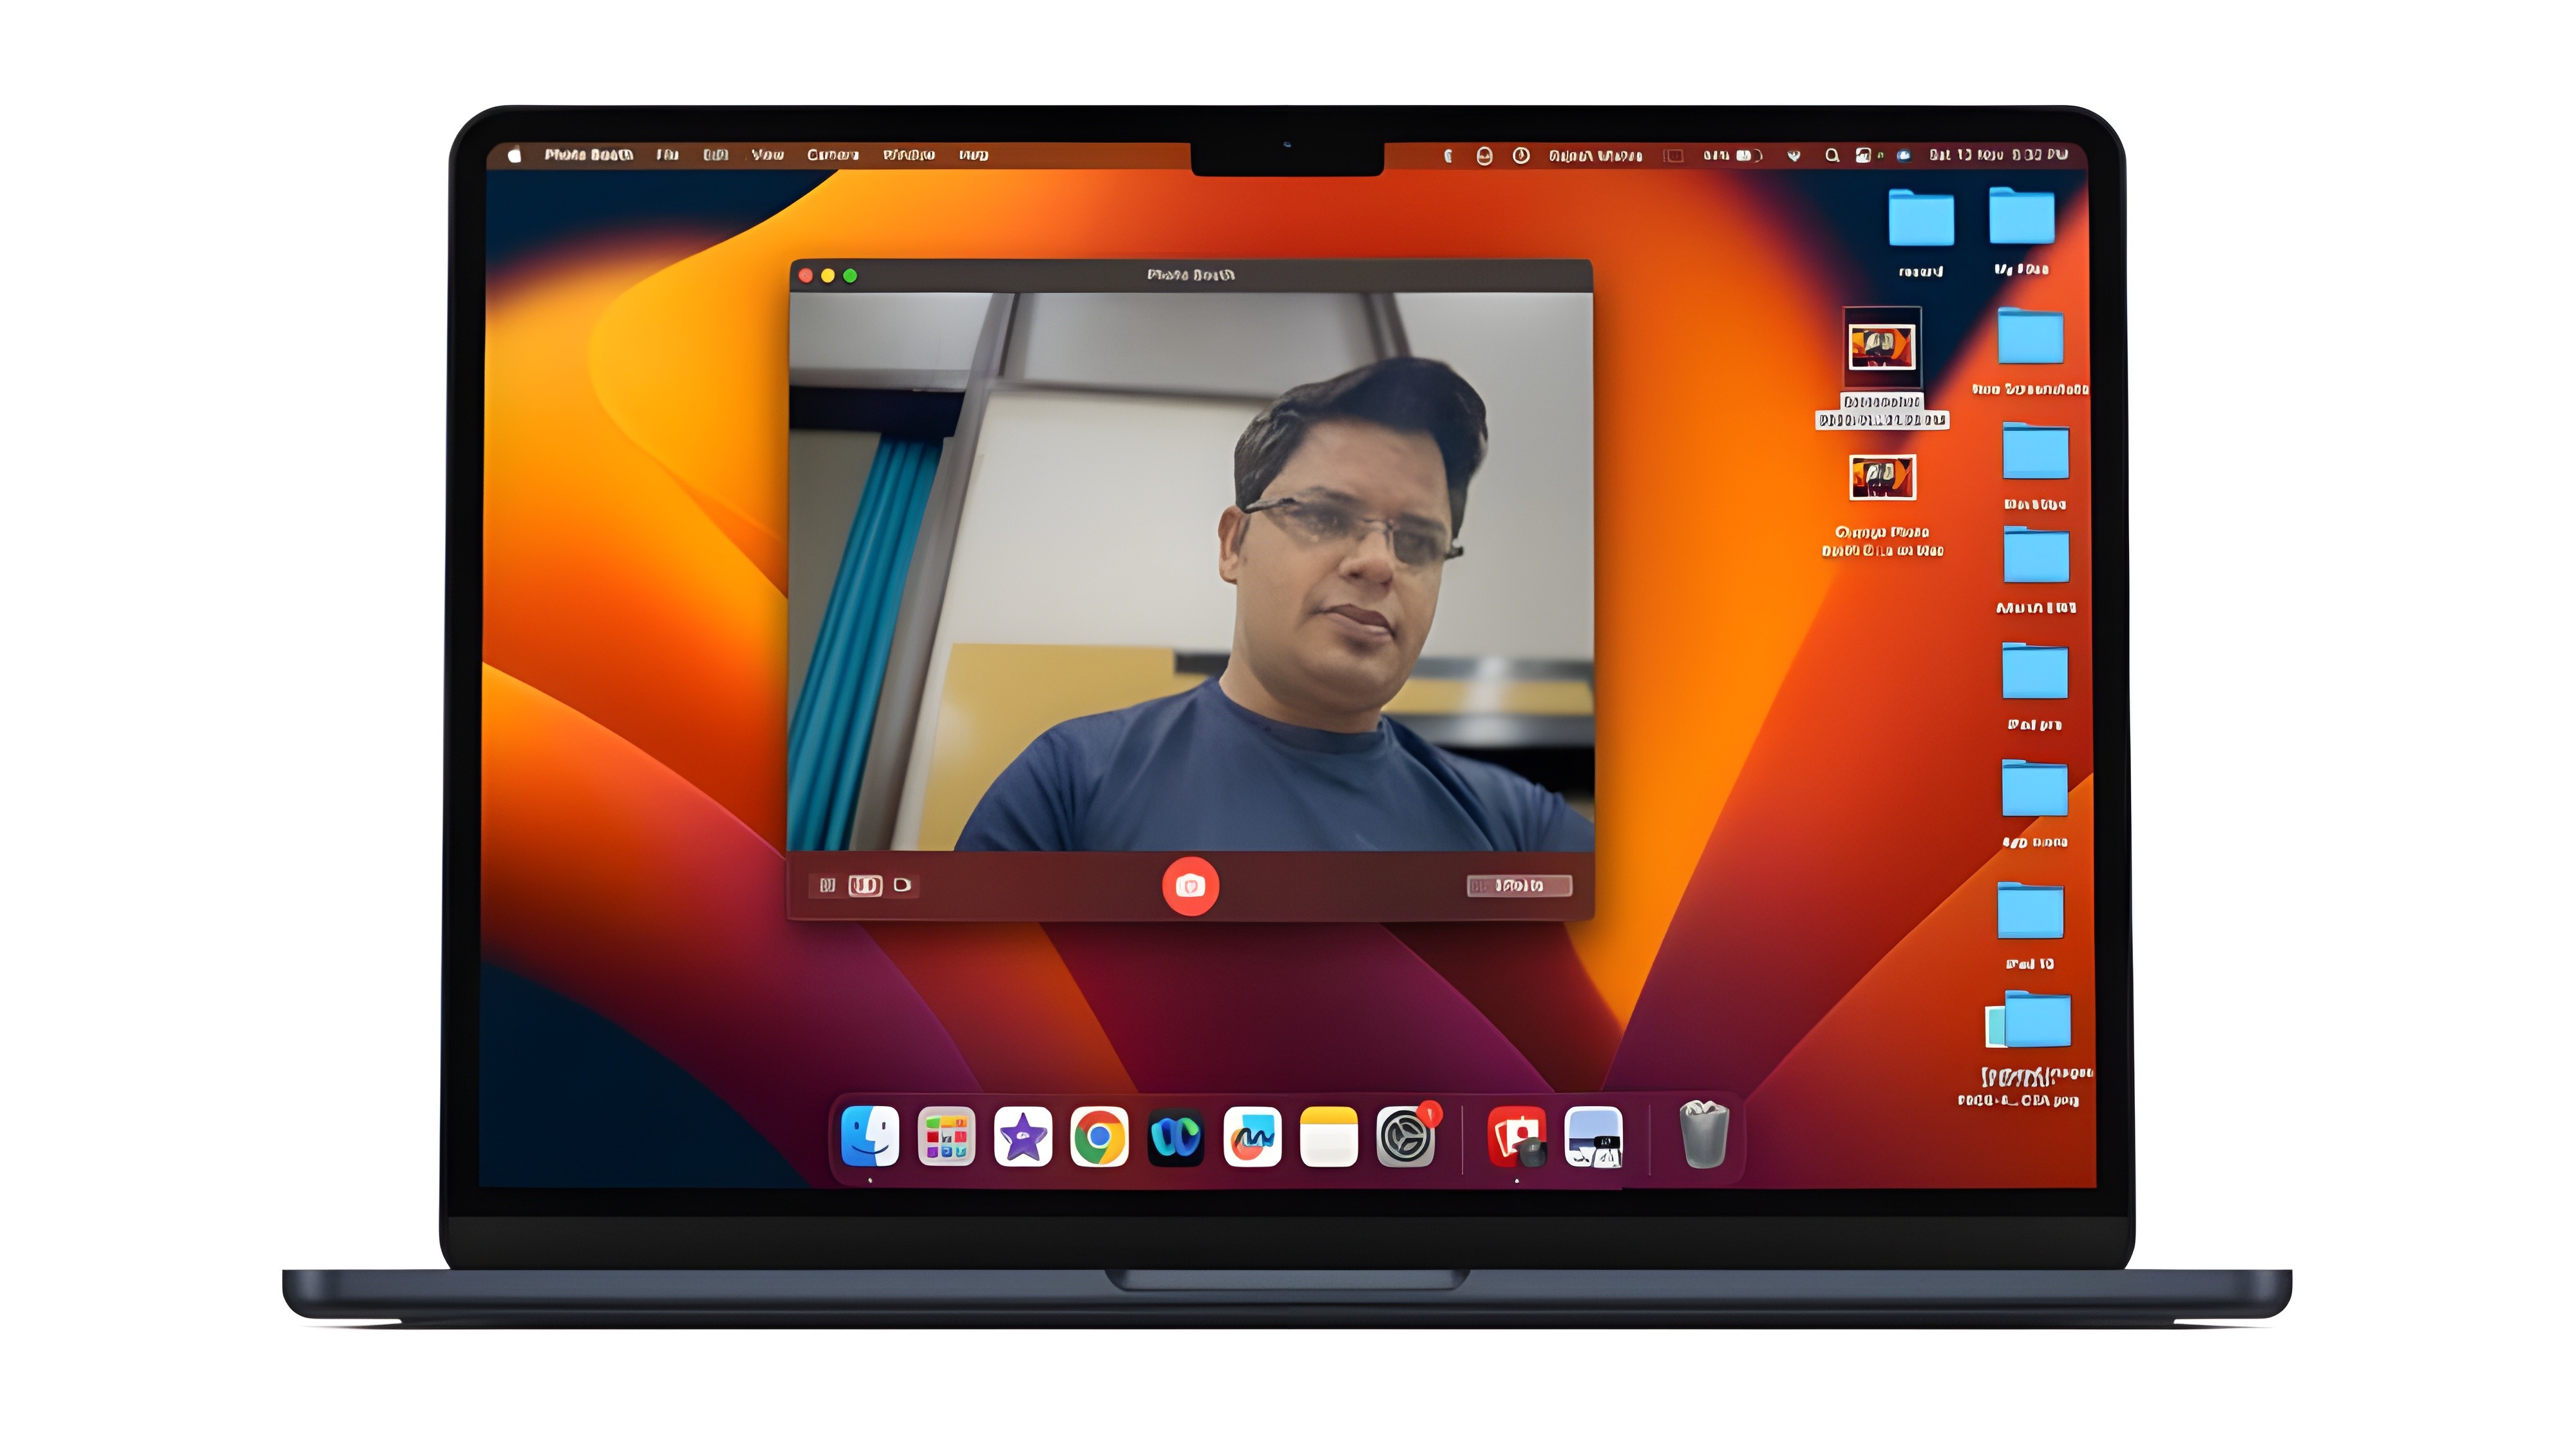
Start by launching the Photo Booth app, which you can find in your Applications folder or by using Spotlight search (Command + Space).
In the app, you'll see three options at the bottom left corner - a single rectangle for taking photos, and two rectangles for recording videos. Click on the icon with two rectangles to switch to video mode.

When ready, tap the red record button to begin. You'll see a countdown before the recording starts, giving you a moment to get ready.
When you've finished recording, click the stop button. Your video will automatically appear in the Photo Booth library, at the bottom of the app. You can review it by clicking on it.
To save your video, simply drag it from the Photo Booth library to your desktop or any folder of your choice.
Photo Booth’s charm lies in its simplicity and ease of use, making it a perfect choice for fun, informal videos. Plus, it offers a range of effects that you can add to your videos for extra entertainment!
Looking for more advice or a step-by-step guide?
Check out this popular video that talks through all the options and guides you through the process:
Tips for Recording Videos on a Mac
Using the step-by-step methods is efficient in getting you started with recording videos on a Mac. However, here are some additional tips to enhance your video recording experience and output.
Maximize Lighting
When it comes to recording video content, good quality directly relates to lighting.
Always make sure you're in a well-lit space. That could mean opening a window or using studio lighting. Good lighting can significantly improve the video quality by making the image clearer and colors more vibrant.
Use High-Quality External Devices
Your Mac's built-in camera and microphone should suffice for casual videos. But, if you're looking to create more professional content, invest in a high-quality external webcam and microphone. This is how you achieve superior video and audio quality.
Practice Screen Transitions
Recording your screen for a presentation or tutorial? Practice your clicks and transitions to ensure a smooth viewing experience. A clean, well-practiced transition keeps viewers engaged.
Use Headphones
Using headphones can help create a clearer audio recording by reducing background noise. This is especially crucial if you're recording in a noisy environment.
Ensure Your Mac is Charged
Lastly, before you start recording, ensure your Mac is either fully charged or connected to a power source.
Video recording can drain your battery quickly, and it would be frustrating to have your session cut off midway due to a dead battery.
Remember, practice makes perfect. The more you record, the lesser the hiccups and the better your videos will become. Happy recording!
Troubleshooting When Recording Videos on Mac
Recording videos on a Mac is usually a straightforward process. However, you may occasionally encounter some hiccups. Here are some common issues and solutions to help you resolve them:
Issue #1: No Sound Recorded
Check the input device options in your Mac's Sound settings. Make sure the correct microphone is selected.
Ensure your microphone is not muted.
If you are using an external microphone, confirm it's properly connected, and drivers (if needed) are up-to-date.
Issue #2: Poor Video Quality
Finding that your video content keeps coming up as blurry or smudged? Here are some quick solutions.
Ensure your screen or camera lens is clean. Smudges or dust can degrade video quality.
If recording with your webcam, adjust your lighting sources. Also, you might consider using an external camera for better quality.
Check video settings in your recording tool, if applicable. Adjusting the resolution can make a difference.
Issue #3: Saving and Exporting Issues
If you're having trouble saving your video or the file is larger than expected, you might want to consider changing the format. QuickTime, for example, allows you to export in lower resolutions or different formats.
If you are working with large files, ensure you have enough storage space on your Mac.
Issue #4: Lag During Screen Recording
Close unnecessary applications and tabs. They can consume memory, making your Mac slow.
Reboot your Mac, as some processes running in the background may be causing the issue.
Issue #5: QuickTime Not Recording
Check if you've given QuickTime permission to access the screen in your Mac’s system preferences.
Redo the process of beginning a recording. Sometimes a simple restart can solve the issue.
Remember, when troubleshooting, the key is patience. It might take a few tries to identify the problem and find the right solution. If you're still encountering issues, consider reaching out to Apple Support.
You may also find the answer by browsing dedicated forums for more advice.
Wrapping Up
Recording videos on your Mac need not be a challenge. With a basic understanding of QuickTime Player, Photo Booth, and Tella, you can commence your video recording journey with ease.
Creating a tutorial for work? Capturing a game-level walkthrough? Simply recording a funny video for a friend?
You now have the tools to succeed.
Take Your Video Recording to the Next Level with Tella
Looking for more control and flexibility during your recording process? Want to polish your recordings without complicated editing software?
Try Tella. Tella is super simple and gives you everything you need to create quality videos every time you hit record.
And with a dedicated Mac App, recording videos has never been easier. Here's a step by step guide.